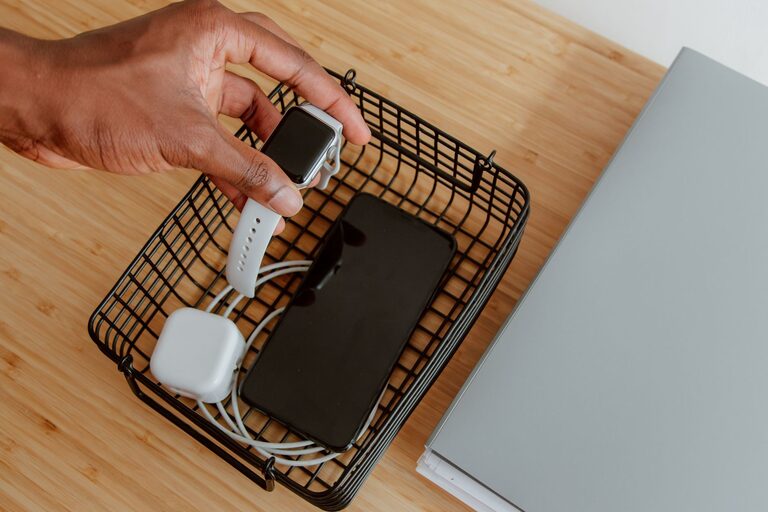
Setting up a dedicated charging station for your devices is a great way to keep your home or workspace organized and ensure all your gadgets stay powered up. Whether you have smartphones, tablets, smartwatches, or wireless earbuds, a well-planned charging station helps reduce clutter and makes charging hassle-free. In this guide, we’ll walk you through how to create an efficient and neat charging station tailored to your needs.
Why Create a Charging Station?
With multiple devices needing power daily, having cords and chargers scattered around can quickly become messy. A charging station offers several benefits:
– Organization: Keeps all your charging cables and devices in one place.
– Convenience: Easily find and charge your gadgets without searching for chargers.
– Safety: Reduces tripping hazards and prevents cables from getting damaged.
– Aesthetic: Makes your space look cleaner and more organized.
What You’ll Need to Set Up a Charging Station
Before starting, gather the basics to make the process smooth:
– Charging station base: This could be a small table, shelf, or a storage box.
– Power strip or charging hub: Multiple outlets or USB ports to plug several devices in simultaneously.
– Charging cables: Use the right cables for your devices, and consider upgrading to shorter or braided cables for durability.
– Cable organizers: Clips, ties, or sleeves to manage and bundle cables neatly.
– Device holders or stands: Keep phones or tablets upright and accessible while charging.
– Labeling materials (optional): Stickers or tags to mark cables and ports.
Step-by-Step Guide to Setting Up Your Charging Station
1. Choose the Right Location
Pick a central and convenient spot where you usually use or keep your devices. Consider the following:
– Close to power outlets
– Away from water or high-traffic areas for safety
– Accessible for all family members or coworkers
Common places include a desk, nightstand, or a designated shelf.
2. Select a Base for Your Station
Your charging station base can be:
– A small table or tray
– A storage box with compartments
– A drawer organizer repurposed to hold devices
– A purpose-built charging station stand available online or in stores
Make sure it’s sturdy and has enough space to fit all devices comfortably.
3. Prepare Your Power Source
Use a power strip or a multi-port USB charging hub to plug in all your devices. Here are some tips:
– Look for surge protection to safeguard your electronics.
– Choose a hub with enough USB ports to accommodate multiple devices.
– Consider fast-charging options if your gadgets support it.
Place the power strip or hub on or near your station base, and hide excess cable length with clips or ties.
4. Organize Your Cables
Cable clutter can ruin the look of your station. Manage cables by:
– Using cable clips or Velcro ties to bundle and route cables neatly.
– Labeling each cable near the plug to identify which device it belongs to.
– Choosing color-coded cables if possible for quick identification.
– Using cable sleeves to group multiple cables together.
5. Add Device Holders or Stands
Device holders keep your gadgets upright and easily visible. They also help prevent devices from sliding off the station. Consider:
– Phone and tablet stands with adjustable angles
– Docking stations that combine charging and device display
– DIY options such as small boxes or trays with dividers
6. Test Your Setup
Plug in each device to ensure everything charges properly. Check that:
– All ports provide sufficient power.
– No cables are tangled or strained.
– Devices fit comfortably on the station without overlapping.
7. Maintain Your Charging Station
Keep your station clean and functional by:
– Wiping surfaces regularly to remove dust and debris.
– Checking cables for wear and replacing damaged ones.
– Updating or adding chargers as you acquire new devices.
– Rearranging devices if your needs change.
Tips for a Smarter Charging Station
– Use smart plugs or timers to reduce power usage.
– Incorporate wireless charging pads for compatible devices to reduce cables.
– Add a small basket or drawer for storing chargers not in use.
– Include a USB power meter to monitor charging performance if you’re a tech enthusiast.
Conclusion
Creating a dedicated charging station is a simple project that can greatly improve how you manage your devices. By organizing chargers, cables, and devices in one spot, you’ll save time, reduce clutter, and protect your electronics. Follow these steps to build a charging station that fits your lifestyle and keeps your gadgets ready for use anytime.
Remember, the best charging station is the one tailored to your daily routine and device collection. Start small and expand as needed, keeping functionality and neatness in mind. Happy charging!